
Recessed lighting has become a cornerstone of modern home design, offering clean aesthetics and functional illumination without the visual bulk of traditional fixtures. Whether you’re renovating a kitchen, finishing a basement, or upgrading a home office, architectural recessed lighting delivers a sleek, professional look that works across virtually every room. Unlike surface-mounted fixtures that can dominate a ceiling, recessed lights sit flush within the drywall, creating uncluttered sightlines and flexible lighting control. Homeowners and DIY enthusiasts are increasingly drawn to this approach because it combines form with substance, your ceiling stays the star, not the fixture. This guide walks through what recessed lighting is, why it matters, which types fit your needs, and what’s involved in planning and installation.
Table of Contents
ToggleKey Takeaways
- Architectural recessed lighting provides a sleek, minimalist aesthetic that frees up ceiling space while offering exceptional flexibility for layered ambient, task, and accent lighting in any room.
- LED recessed lights are the modern standard, using 75–80% less energy than incandescent bulbs and lasting 25,000+ hours, making them the most cost-effective choice over a home’s lifetime.
- Plan your recessed lighting layout using the one-4-inch-fixture-per-4–6-square-feet rule, spacing fixtures 24–36 inches apart in task areas and creating grid or staggered patterns for polished, intentional results.
- Retrofitting architectural recessed lighting into finished ceilings requires cutting holes, fishing electrical wire, and securing housings—tasks best handled with a licensed electrician for the rough-in if you’re unfamiliar with electrical work.
- Always prioritize safety by turning off power at the breaker, using a voltage tester, and wearing appropriate protective gear; verify local building codes before starting, as some jurisdictions require permits for new circuits.
- IC-rated LED housings are essential if thermal insulation sits directly above your ceiling, ensuring direct contact with insulation without clearance complications or efficiency loss.
What Is Architectural Recessed Lighting?
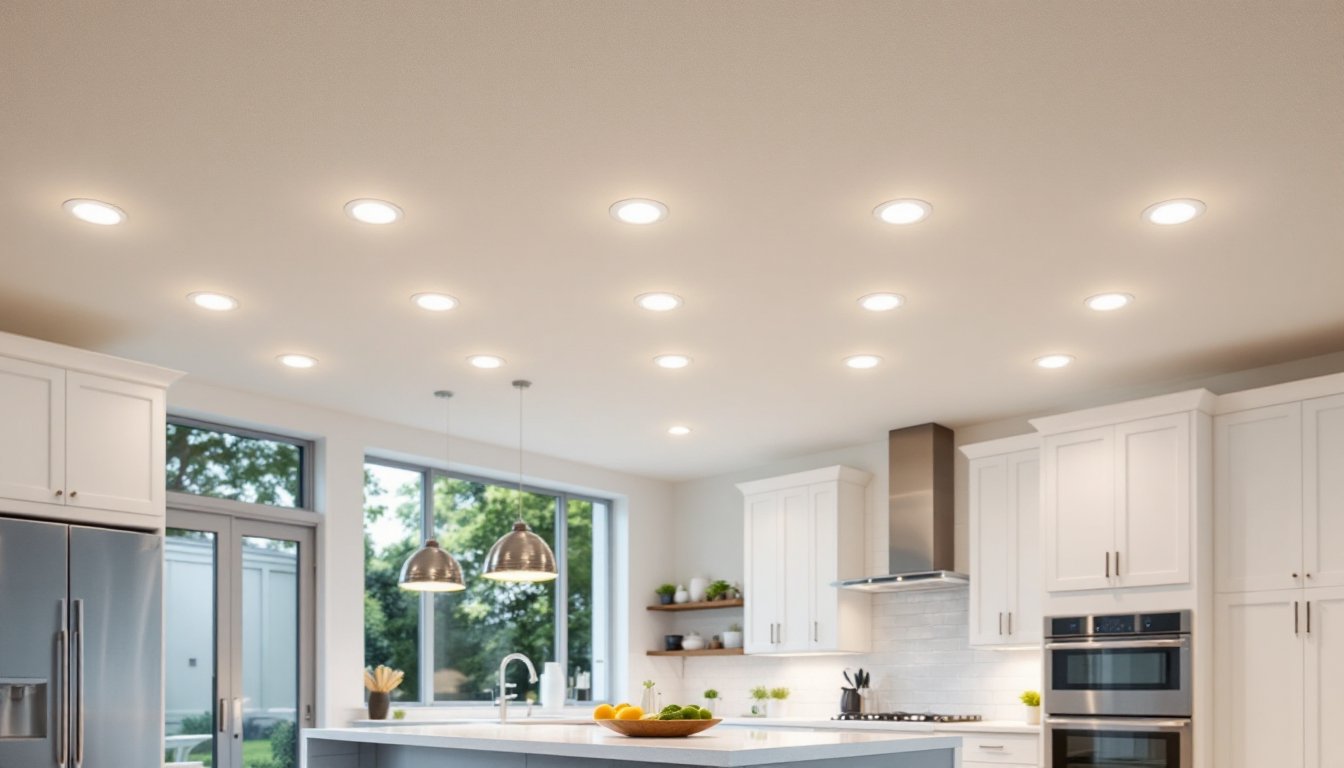
Architectural recessed lighting, also called can lights or downlights, refers to fixtures mounted inside the ceiling cavity, with only the trim ring and lens visible from below. The housing sits in the joist space above your finished ceiling, and the trim (the visible part) sits flush with the drywall. This design creates a minimalist look and allows designers to create clean, grid-like patterns or asymmetrical layouts depending on the room’s purpose.
The basic anatomy includes the housing (the metal can that sits in the joist cavity), the trim ring and reflector (which sits inside the housing), and the lamp (the bulb, LED, halogen, or incandescent). Recessed fixtures are rated by their trim diameter, measured in inches: 4-inch trims are most common for general lighting, while 6-inch options provide more light spread. The term “architectural” simply emphasizes that these fixtures are chosen with design intent in mind, not just tossed in as an afterthought.
These lights work best in spaces with adequate attic or crawl space above the ceiling. If you’re building new or doing a major renovation with open joists, installation is straightforward. Retrofitting into an existing finished ceiling requires cutting holes and careful wiring, so plan accordingly.
Benefits of Recessed Lighting for Modern Homes
The appeal of recessed lighting goes beyond looks. These fixtures free up your ceiling and wall space, making rooms feel larger and less cluttered, a real advantage in smaller homes or open-plan layouts. They also offer exceptional flexibility: you can layer them with ambient, task, and accent lighting by adjusting placement and installing dimmers.
Energy efficiency is a major draw, especially with LED recessed lights. A quality LED downlight uses 75–80% less energy than an incandescent equivalent and lasts 25,000+ hours compared to 1,000 hours for incandescent bulbs. Over a home’s lifetime, that difference is substantial on both your electric bill and maintenance headaches.
Recessed fixtures are also safer for ceiling-mounted lighting in kitchens and bathrooms because they’re housed within the ceiling, reducing the risk of moisture accumulation or dust collection on exposed reflectors. Modern trims come in various finishes, white, black, brass, and more, so you can match your décor without swapping bulbs or housings.
Another underrated benefit: controllability. String recessed lights on separate circuits or dimmers to set different moods, bright task lighting for cooking, dimmed ambiance for entertaining. That’s something a single overhead fixture rarely achieves.
Types of Recessed Lighting Fixtures
LED vs. Halogen vs. Incandescent Options
Choosing the right lamp type is one of the most important decisions you’ll make. LED recessed lights are now the standard recommendation for new installations and retrofits. They’re efficient, durable, available in a wide range of color temperatures (warm 2700K to cool 5000K+), and are dimmable if you choose dimmable-rated models. Most LED trims cost $15–$40 per fixture, a price that’s competitive with halogens and far more economical over time.
Halogen downlights were long the go-to for accent lighting because they render color accurately and are available in very warm tones (2900K). But, they’re significantly hotter to the touch, consume more power than LEDs, and last only 2,000–3,000 hours. Many building codes now discourage halogens in residential settings due to fire risk in confined spaces. If you’re retrofitting an old system using halogens, migrating to LED is worth the upfront cost.
Incandescent recessed lights are largely phased out in new construction due to efficiency standards, though you may encounter them in older homes. They’re warm and inexpensive but burn out frequently and waste energy as heat. Unless you have existing fixtures running incandescent and they’re working fine, there’s no reason to stick with them.
For most DIYers, the choice is simple: go LED. Look for fixtures rated IC-rated (for direct contact with insulation) if your attic has thermal insulation directly above the ceiling. Non-IC fixtures require clearance, which can complicate attic access and energy efficiency.
Planning Your Recessed Lighting Layout
A good layout balances aesthetics and function. Start by measuring your room and identifying zones: prep areas in a kitchen, work surfaces in an office, circulation paths in a hallway. A rough rule is one 4-inch recessed light per 4–6 square feet for general ambient lighting, though task areas may need denser coverage.
For a typical kitchen island or bathroom vanity, space lights 24–36 inches apart in a straight line. For general room lighting, create a grid or staggered pattern, evenly spaced looks intentional, while off-grid layouts can feel contemporary. Use a laser level and painter’s tape to mark trim locations before cutting holes: it’s the difference between a polished look and a scattered, amateur feel.
Consider lighting layers. Recessed lights work best paired with a dimmer circuit for ambient lighting, plus dedicated lights for task areas (over a desk, sink, or work surface). This flexibility is why recessed fixtures are ideal for open-plan homes: you can adjust the mood without rearranging furniture.
Also verify your ceiling structure. Standard recessed housings require 8–10 inches of clearance above the trim, meaning your joist depth and attic/crawl space must accommodate them. If you have shallow ceiling joists or limited attic access, consider surface-mounted recessed-style fixtures (essentially recessed-looking trim on the ceiling surface) or hire a professional to assess your options. Ceiling lighting for home offices requires even more precision if you’re using them as task lighting over a desk or workspace.
Installation Basics and DIY Considerations
Installation difficulty depends on your ceiling type and whether you’re working with new construction or retrofitting. New construction is far easier: you have open joists, so you simply nail the housing to the joists, run wiring (typically 12/2 or 14/2 Romex cable, depending on your circuit and local code), and trim out the fixtures after drywall is hung.
Retrofitting into a finished ceiling is more involved. You’ll need to:
- Mark hole locations using a laser or tape measure.
- Use a drywall hole saw (typically 4–6 inches, depending on trim diameter) to cut through the ceiling.
- Fish electrical wire from your breaker panel to the first fixture location, this often requires running wire through walls or attic space.
- Connect fixtures in series using wire connectors rated for your wire gauge.
- Install housings and secure them to joists or blocking.
- Trim out fixtures and install lamps.
Key safety points: Always turn off power at the breaker before working on wiring. Use a voltage tester to confirm power is off. If you’re unfamiliar with electrical work, hire a licensed electrician for the rough-in: many DIYers are comfortable installing fixtures once wiring is in place. Codes vary by jurisdiction, some require a permit for new circuits, others do not. Check locally before starting.
You’ll need:
• Drywall hole saw (4-inch or 6-inch, depending on fixture trim diameter)
• Wire strippers and linesman pliers
• Voltage tester
• Stud finder (to locate joists)
• Laser level or chalk line
• Wire connectors (appropriately rated for your wire gauge)
• Recessed light housings and trims
• LED lamps (or halogen, if you prefer)
Wear safety glasses when cutting drywall, dust falls into your eyes constantly. Gloves protect your hands from sharp drywall edges and rough attic insulation. If your attic has loose fiberglass insulation, wear a dust mask rated N95 or better.
For detailed step-by-step guidance, resources like installing recessed lights and comprehensive design guides provide visual walkthroughs and expert tips. Recessed lighting ideas for different rooms can also spark layout ideas tailored to kitchens, bedrooms, bathrooms, and living spaces.
Conclusion
Architectural recessed lighting transforms a space with minimal visual fuss and maximum design impact. Whether you’re planning a retrofit or building new, the key is choosing the right fixture type, LED is almost always the smart choice, and taking time on layout and prep work. Installation is achievable for handy DIYers, especially if you’re comfortable running wiring: otherwise, partnering with an electrician for the rough-in keeps things safe and code-compliant. The result: a bright, clean ceiling that lets your home’s design speak for itself.


