
Denver’s high altitude and intense sun create unique conditions that demand thoughtful outdoor lighting design. Whether you’re adding security to your entryway, creating ambiance on a patio, or lighting a pathway through your landscape, outdoor lighting in Denver requires consideration of the region’s climate, building codes, and your specific needs. This guide walks you through the essentials, from understanding what works in Denver’s environment to choosing fixtures, planning layouts, and handling installation yourself.
Table of Contents
ToggleKey Takeaways
- Outdoor lighting in Denver must withstand extreme temperature swings, heavy snow, and intense UV exposure, requiring fixtures made from stainless steel or powder-coated aluminum rather than bare metal.
- Plan pathway lights for 3 to 4 feet of clearance minimum to remain visible after snowfall, and position security floodlights 8 to 10 feet high to eliminate dark pockets and illuminate entries effectively.
- Low-voltage LED landscape systems (12V or 24V) offer the best DIY solution for Denver homeowners—they require no permits, cost one-third to operate versus halogen, and can be installed in shallow trenches 4 to 6 inches deep.
- Denver’s building codes require GFCI protection and proper conduit burial (12 inches for low-voltage, 18 inches for 120V lines), with all hardwired outdoor lighting installations requiring a permit and licensed electrician.
- Pair dusk-to-dawn sensors with timers to prevent lights from staying on all night during summer months when sunset occurs as late as 9 PM, and use warm white (2700K–3000K) for accent lighting and neutral to cool white (4000K–5000K) for security zones.
- Always call 811 before trenching to locate underground utilities, use sealed junction boxes with silicone gaskets to prevent snow melt corrosion, and test voltage at every splice with a multimeter before burying wire.
Understanding Denver’s Outdoor Lighting Needs
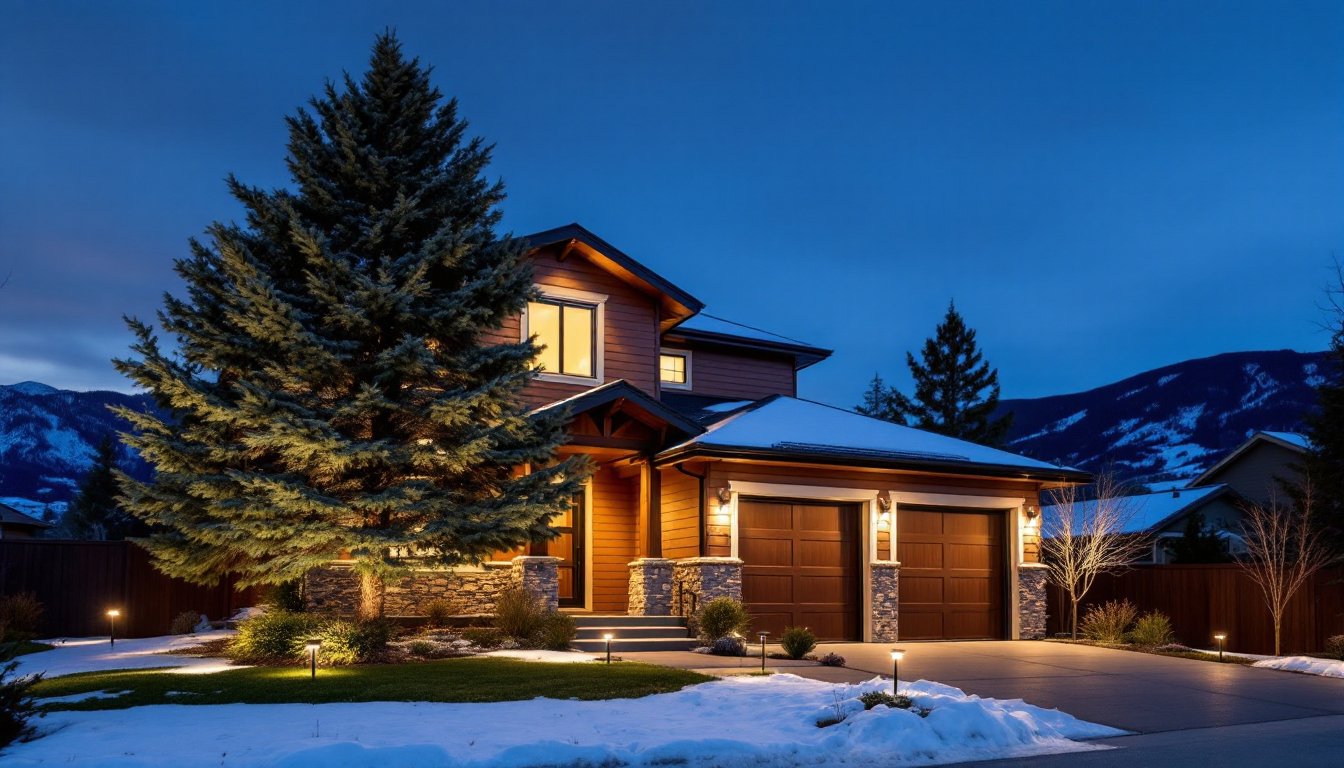
Denver sits at 5,280 feet with nearly 300 days of sunshine annually, but winters bring significant snow and ice. Your outdoor lighting must withstand temperature swings (from below zero to 80°F in a single season), heavy snow load on fixtures, and intense UV exposure that degrades materials faster than in coastal regions.
Why Outdoor Lighting Matters in Denver’s Climate
Snow and ice reflect and scatter light unpredictably, so fixtures must be positioned higher than you’d think to remain visible after a storm. Standard 2-foot pathway lights get buried: plan for 3 to 4 feet of clearance minimum. Salt and mineral deposits on fixtures corrode untreated metal quickly, choose stainless steel or powder-coated aluminum over bare iron or painted steel.
Denver’s building codes (enforced through the Denver Building Department and aligned with the International Building Code) require outdoor electrical work for fixed lighting to meet NEC Article 680 for wet locations. This typically means GFCI-protected outlets and proper conduit burial at least 12 inches deep for low-voltage systems, 18 inches for standard 120V lines. If you’re adding hardwired lighting, a permit is required and a licensed electrician is the smart move.
Daylight savings and Denver’s latitude mean you’ll have sunset as early as 4:30 PM in December and as late as 9 PM in June. Fixture selection should anticipate this variability, dawn-to-dusk sensors work well, but pairing them with timers prevents lights from staying on all night in summer.
Best Types of Outdoor Lighting for Denver Homes
The most practical outdoor lighting strategy uses a mix of fixture types: accent lights to highlight architectural or landscape features, pathway lights for safety, security floodlights for entries, and ambient patio lighting for living spaces.
Accent and Landscape Lighting
Accent lighting transforms a foundation planting or mature tree into a focal point after dark. A 10W to 20W LED spotlight positioned 6 to 8 feet from the subject and aimed slightly upward creates dramatic shadow play without washing out plant detail. Bury or conceal the fixture body: only the beam should be visible. For Denver, choose fixtures with tempered glass or polycarbonate lenses rated for -40°F: standard acrylic becomes brittle in hard freezes.
Landscape lighting also includes uplights (shining upward through foliage), downlights (mounted high to wash a garden bed), and cross-lighting (two fixtures from opposite angles to create depth). Warm color temperatures (2700K to 3000K) feel welcoming and blend naturally with evening shadows. Cool white (5000K+) looks institutional, save it for security zones.
LED systems now dominate. A quality low-voltage LED landscape kit (12V or 24V) runs off a transformer plugged into a standard outlet, requires no digging or permits, and costs one-third to operate versus halogen. Westover Hall Hotel’s guide on how to choose outdoor lighting fixtures covers fixture selection in depth, including finish durability in Denver’s climate.
Pathway and Security Lighting Solutions
Pathway lighting serves dual purpose: it’s practical (preventing trips and defining walkways) and aesthetic (creating visual interest at night). In Denver, pathways buried in snow need visibility from above.
LED pathway lights (2W to 5W per fixture) space 4 to 6 feet apart provide adequate footfall lighting without glare. Stick-style fixtures (6 to 12 inches tall) are less conspicuous than bollards and work well along garden edges. Recessed step lights on stairs are essential, a 3W to 5W recessed fixture per tread prevents missteps. Ensure steps are marked on risers with reflective paint or tape as backup: no light fixture should be your only wayfinding cue.
Security lighting differs in intent: it deters intrusion by eliminating dark pockets and clearly illuminating faces and license plates. Mount motion-activated floodlights (30W to 50W LED equivalent) 8 to 10 feet high at entries, garages, and side yards. Set motion sensors to a 15 to 20-foot radius to avoid false triggers from passing traffic or animals. Pair motion lights with dusk-to-dawn sensors so they only activate between sunset and sunrise.
Color matters for security. Warm white blends better with homes but is less effective for recognition. Many security experts recommend neutral white (4000K) for entries and cool white for garage aprons where vehicle details matter. Denver’s bright, clear nights mean you’ll see clearly at distance, 30W LED (roughly equivalent to a 250W halogen) typically suffices unless you’re lighting a large parking area.
Check 20 outdoor lighting ideas to brighten your yard and pathways for layout inspiration specific to different property sizes and shapes.
Installation Tips for Denver Properties
Most DIY outdoor lighting work involves low-voltage systems, which are safe, don’t require permits, and forgiving of minor mistakes. High-voltage (120V) hardwired lighting must be permitted and installed by a licensed electrician in Denver.
Materials and Tools for Low-Voltage Install:
- Low-voltage transformer (12V or 24V) rated for total wattage of your fixtures (a 300W transformer handles roughly 20 to 30 landscape lights)
- Low-voltage landscape wire (10 gauge minimum) buried or concealed
- Wire connectors rated for outdoor/wet conditions
- Wire splice boxes if running multiple branches
- Shovel for trenching (or rent a trenching machine for large layouts)
- Voltage tester to verify connections before burying wire
- Work gloves, eye protection
Step-by-Step Approach:
-
Plan your layout on paper. Mark fixture locations, wire runs, and transformer placement (near an outlet, under an eave to protect from standing water, away from foot traffic).
-
Trench shallow runs. Low-voltage wire can sit 4 to 6 inches deep in Denver soil. Avoid digging where underground utilities may run: call 811 for a free locate if you’re unsure. Mark utility lines with white flags before trenching.
-
Run wire in bundles, splicing branches at designated boxes. Strip 1/4 inch of insulation on each conductor, insert into waterproof connectors, and crimped firmly. Test voltage at each splice with a multimeter before covering.
-
Connect fixtures, snapping them onto the main wire harness (most systems use tool-free connectors). Don’t force connections, dry-run positioning before permanently installing.
-
Bury wire carefully. In Denver’s rocky soil, lay landscape fabric over the trench first to prevent wire from snagging on stones. Cover with soil, leaving fixture posts slightly proud so snow won’t bury them.
-
Set transformer timer and dusk-to-dawn sensor. Test the system during daylight (disable the sensor temporarily) to verify all fixtures illuminate and brightness meets expectations.
Denver-Specific Considerations:
Winter installation is possible but harder, frozen ground requires more digging effort. If trenching in late fall, compact soil well to prevent settling under snow weight. In spring, check trenches for displacement and top-dress as needed.
Choose fixtures with sealed junction boxes and silicone gaskets, not rubber. Snow melt seeps into crevices: sealed gaskets prevent corrosion better than relying on drainage.
Safety gear required: gloves, eye protection, and sturdy boots (digging near utilities risks electric shock if you hit a live line, another reason to call 811 first).
Many Denver homeowners benefit from consulting smart home integration guides. Digital Trends regularly reviews outdoor smart lighting systems that offer app control and scheduling, useful for adjusting brightness or schedules as seasons change.
Conclusion
Outdoor lighting in Denver is achievable without professional help if you’re installing low-voltage systems and willing to trench and test connections. The payoff, a well-lit, secure, and beautiful outdoor space, makes the effort worthwhile. Start with accent or pathway lighting to learn the basics, then scale up to security and ambient lighting as confidence grows. Always respect permits for hardwired work, test voltage before burying wire, and choose finishes rated for Denver’s cold and UV-intense climate.


