
Getting landscape lighting right starts with understanding what runs beneath it, the cable itself. Whether you’re illuminating a front walkway or creating ambient mood lighting around your patio, the cable you choose and how you install it determines whether your system lasts two seasons or ten. Most homeowners don’t realize that outdoor lighting wire isn’t just a secondary concern: it’s the backbone of any reliable landscape lighting setup. This guide walks you through cable types, voltage considerations, layout planning, installation techniques, and maintenance, everything you need to create a system that’s both safe and long-lasting.
Table of Contents
ToggleKey Takeaways
- Landscape lighting cable is the backbone of any reliable outdoor lighting system, with low-voltage options (12 or 24 volts) being safer and more affordable for most residential properties.
- Wire gauge (AWG) and cable length determine voltage drop; use 12 or 10 AWG cable for standard runs, and thicker wire or a second transformer for distances exceeding 100 feet to maintain consistent brightness.
- Always use direct-burial-rated cable when burying landscape lighting cable 6–8 inches deep, and invest in waterproof connectors with silicone sealant to prevent moisture damage and early failure.
- Secure exposed cable with UV-rated clips every 2–3 feet and route it along house foundations or existing pathways to prevent wind, weather, and rodent damage.
- Seasonal inspections for cracks, corrosion, and rodent damage catch problems early; dim lights usually indicate voltage drop or loose connections that are easily fixed with proper troubleshooting.
- For line-voltage cable work or hardwiring to your home’s electrical panel, hire a licensed electrician rather than risking serious safety hazards.
Understanding Landscape Lighting Cable Types and Specifications
Landscape lighting cable comes in several forms, and each serves a specific purpose. The most common type is low-voltage landscape lighting wire, typically rated for 12 or 24 volts. This cable is smaller in diameter, easier to work with, and doesn’t require a permit in most jurisdictions because it poses minimal shock risk.
Line-voltage cable (120/240 volts) is heavier-duty, delivers more power over longer distances, and is what you find running to outdoor outlets or hardwired fixtures. It requires proper conduit protection, permits, and often a licensed electrician for installation.
Voltage and Wire Gauge Essentials
Wire gauge, measured in AWG (American Wire Gauge), determines how much current the cable can safely carry. Lower numbers mean thicker wire and higher capacity. For low-voltage landscape systems, 12 AWG or 10 AWG cable is standard: thinner gauges like 14 AWG work for short runs under 50 feet, but voltage drop becomes noticeable over longer distances.
Voltage drop is the culprit behind dim lights at the far end of a long run. If your cable run exceeds 100 feet, stepping up to thicker wire, or using a second transformer closer to distant fixtures, keeps brightness consistent. Always check your transformer’s output and the fixture specifications: mixing mismatched voltages will damage equipment and void warranties.
Choosing Between Low-Voltage and Line-Voltage Cable
Low-voltage systems dominate residential landscape lighting for good reason: they’re safer, cheaper to install, and don’t require a permit or licensed electrician in most areas. You can buy a complete kit with transformer, cable, connectors, and fixtures for under $200. These systems run on a 12 or 24-volt transformer powered by a standard household outlet, and the cable itself poses virtually no shock hazard.
Line-voltage systems are the choice when you need to light large areas or run cable over extreme distances, think stadium-scale outdoor spaces or commercial properties. The trade-off: higher installation cost, permit requirements, and the need for conduit and proper grounding. Damage to line-voltage cable can be life-threatening.
For most homeowners, low-voltage is the practical choice. But, if you’re installing outdoor lighting fixtures that demand consistent brightness across a sprawling property, consult a professional before committing to either system. Mixing systems on a single property is possible but complicated.
Planning Your Landscape Lighting Layout and Cable Run
Before digging a single trench, map out your entire system on paper. Identify where your power source (transformer) will live, typically near an outdoor outlet or on the side of the house, and trace the path your cable will take to each fixture. This plan prevents you from discovering halfway through installation that your cable won’t reach your back patio.
Measure each run segment honestly. Account for the full path of the cable, including any vertical rises or obstacles that force detours. Add 10–15% extra length for terminations and future adjustments. A 50-foot run that looks straight on paper might actually be 65 feet when you factor in going around structures.
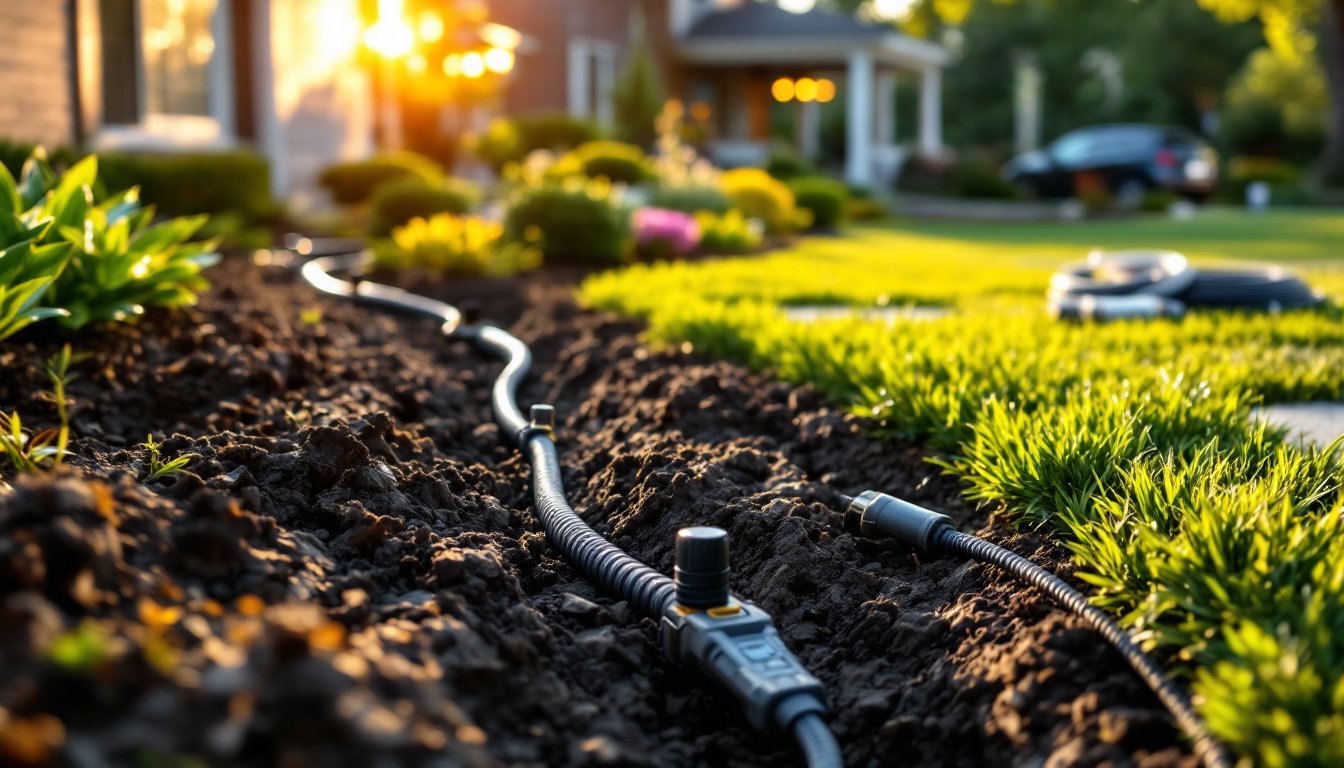
Consider where cable will be exposed or buried. Exposed cable should be routed along the house foundation or under eaves where foot traffic won’t damage it. Buried cable typically runs 6–8 inches deep in a shallow trench, out of reach of shovels and lawn equipment. Always call 811 or your local utility locating service before digging: outdoor lighting projects often uncover existing utilities.
Installation Best Practices for Durability and Safety
Preparation separates a system that lasts from one that fails mid-season. Start by clearing the path of rocks, roots, and debris that might puncture cable during burial. If burying cable, dig a clean trench, 6–8 inches deep, wider than the cable itself, so it doesn’t rest against sharp objects.
When running buried cable, use direct-burial-rated cable (marked as such on the jacket). Standard landscape cable corrodes underground. In regions with severe freeze-thaw cycles, bury cable below the frost line to avoid heaving. If that’s not practical, use conduit protection for the portion above ground.
For connections, invest in proper waterproof connectors designed for outdoor use. Crimp-on or soldered connections wrapped in electrical tape degrade quickly in moisture. Use weatherproof junction boxes for any splices, and seal all connections with silicone caulk or dielectric grease.
Wear safety glasses and work gloves when handling cable and connectors. If installing line-voltage cable or hardwiring to your home’s electrical panel, stop and hire a licensed electrician, this isn’t cosmetic work.
Secure cable to walls or structures using UV-rated cable clips spaced every 2–3 feet. This prevents wind, weather, and rodents from moving it around or chewing through it. Route cable along existing pathways when possible rather than creating new bare-dirt trails.
Maintenance and Troubleshooting Common Cable Issues
A landscape lighting system in good shape requires minimal fussing, but seasonal checks pay off. At the start and end of each season, visually inspect cable for cracks, cuts, or exposed copper. Look for rodent damage, squirrels and rabbits will chew through cable, especially in winter when food is scarce.
Dim or flickering lights usually point to a voltage-drop issue or a loose connection. First, check all connectors for corrosion or green oxidation: tighten or clean as needed. If multiple fixtures fail at once, the transformer may have failed or tripped its internal breaker (unplug it for 30 seconds, then try again). If one fixture dims while others stay bright, that fixture’s wiring is likely compromised.
After heavy rain or flooding, leave the system off for 24 hours to allow residual moisture to dry. Submersion doesn’t instantly kill components, but powered-up wet systems court short circuits.
For LED home lighting systems, be aware that older landscape transformers may not play well with newer LED fixtures due to minimum load requirements. If adding LED fixtures to an aging system, test a single fixture first before buying a full set.
Snow and ice pose unique challenges in cold climates. Buried cable is fine, but exposed runs can become brittle if temperatures drop below the cable’s rated minimum (usually –40°F for landscape cable). Avoid yanking on frozen cable during removal: let it warm first.
Conclusion
Installing landscape lighting cable is a manageable weekend project for most DIYers, provided you start with the right materials and take planning seriously. Choose low-voltage for simplicity and safety, measure twice, use direct-burial cable underground, and invest in waterproof connectors. Seasonal inspections catch problems early and keep your system running reliably for years. When in doubt about line-voltage work or hardwiring to your home’s panel, call a professional, that’s not laziness, it’s smart risk management.


