
An outdoor chandelier transforms a bare patio, deck, or entryway into an elegant outdoor room, no contractor license required. Unlike indoor chandeliers, outdoor fixtures handle rain, temperature swings, and UV exposure while delivering the same sophisticated ambiance. Whether you’re hanging one over a dining area or creating focal-point lighting for a pergola, understanding the differences between indoor and outdoor models, picking the right style for your space, and learning proper installation will set you up for years of trouble-free, beautiful lighting. This guide walks you through everything you need to know about selecting, installing, and maintaining outdoor chandelier lighting that matches your home and withstands the elements.
Table of Contents
ToggleKey Takeaways
- Outdoor chandelier lighting requires weather-resistant materials (powder-coated steel, stainless steel) and UL ratings like IP54 or higher to withstand rain, temperature swings, and UV exposure unlike indoor chandeliers.
- Choose a chandelier diameter roughly one-tenth the width of your space, measure 24–30 inches above dining tables, and ensure at least 6 feet 6 inches clearance for safe head passage.
- Hardwire outdoor chandeliers to a dedicated 15–20 amp circuit using exterior wire connectors and silicone caulk to seal electrical connections and prevent water damage and fire hazards.
- Use outdoor-rated LED bulbs (25,000+ hours lifespan), aim for 2700K–3000K color temperature for ambiance, and 1–1.5 lumens per square foot for ambient lighting.
- Maintain outdoor chandelier fixtures twice yearly by cleaning with mild soap, inspecting for rust and water pooling, and applying automotive wax to metal finishes every 12–18 months.
- Check local building codes and obtain permits for electrical work before installation, and hire a licensed electrician if uncertain—the investment prevents insurance voidance and safety hazards.
What Makes Outdoor Chandeliers Different From Indoor Options
The core difference comes down to materials and ratings. Indoor chandeliers are designed for stable, dry conditions: outdoor models must resist moisture, salt spray, temperature extremes, and UV degradation. Look for fixtures rated wet location or damp location by the UL (Underwriters Laboratories) standard, this label appears on the product documentation and packaging.
Outdoor chandeliers use corrosion-resistant materials like powder-coated steel, stainless steel, or sealed wood. Their wiring insulation is thicker, and electrical connections are sealed or potted to prevent water ingress. Bulbs and shades are also engineered for outdoor use: regular fabric shades will deteriorate fast, so outdoor options use weather-resistant materials like sealed linen, acrylic, or polycarbonate.
Another practical difference: outdoor chandeliers typically have drainage holes or vents to prevent water pooling inside the fixture. Indoor chandeliers lack these because standing water indoors isn’t a concern. When shopping, confirm the fixture’s IP (Ingress Protection) rating, IP54 or higher means it can handle moisture and dust. Most quality outdoor chandeliers sit at IP54 to IP65, which translates to solid protection against rain and spray.
Budget matters here too. An outdoor-rated chandelier costs more upfront than an indoor model of similar size, but it skips the premature rust, corrosion, and bulb failure that come from using an indoor fixture outside.
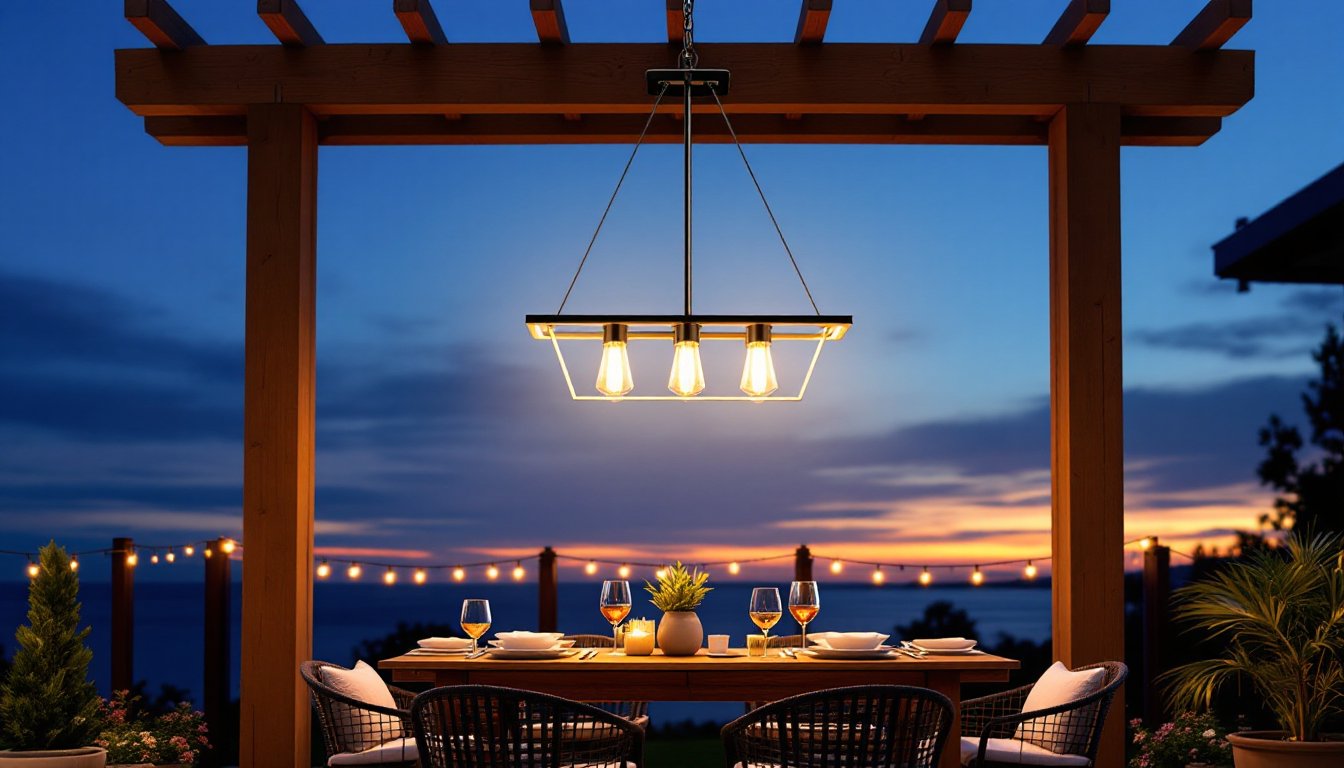
Top Styles and Designs for Every Outdoor Space
Outdoor chandeliers come in four broad aesthetic families: modern minimalist, rustic/farmhouse, traditional/coastal, and transitional. Modern designs use clean lines, geometric forms, and brushed nickel or matte black finishes, they work well on contemporary homes or sleek pergolas. Rustic options feature wrought iron, wood accents, or candle-style bulbs and suit older homes, covered porches, or cottage-style decor.
Traditional chandeliers draw from classic indoor styles but in outdoor-rated materials. Coastal variants lean into weathered finishes, rope details, or nautical motifs and pair naturally with beach houses or homes near water. Transitional designs blend traditional silhouettes with modern finishes, offering flexibility if your décor pulls from multiple influences.
Size and scale make or break the look. A tiny chandelier over a 20×15-foot patio will get visually lost: conversely, a massive fixture over a small 8×8-foot entryway overwhelms the space. A useful starting point: the chandelier’s diameter (in inches) should be roughly one-tenth the width of the room it’s lighting. For an entryway or accent zone, slightly smaller works fine, aim for 18 to 28 inches wide for most residential patios.
Choosing the Right Size and Scale for Your Patio or Entryway
Measure your space first. If you’re hanging a chandelier over a dining table, the fixture should sit 24 to 30 inches above the table surface and ideally be 8 to 10 inches narrower than the table width. For a pergola or open patio, center the chandelier on the space and ensure it clears head height by at least 6 feet 6 inches for safe passage, nobody wants a forehead bump.
Consider ceiling height too. A 8-foot ceiling limits you to compact designs (16 to 20 inches wide) to avoid a cramped feeling. With a 10-foot ceiling or open pergola, you can go bigger (24 to 36 inches), the extra vertical space makes a statement piece breathe. Weight matters: most residential ceiling joists can handle 15 to 20 pounds, but confirm before buying. Heavier bronze or wrought-iron chandeliers (25+ pounds) may need extra bracing.
When shopping online or visiting a showroom, take photos of your space and measure the wall or ceiling area where you plan to mount. Most retailers show dimensions clearly: don’t guess from photos alone. Many outdoor chandelier lighting options available online help narrow down the style and size before you commit.
Installation Tips: Placement and Mounting Considerations
Before you buy, locate the electrical source. Hanging an outdoor chandelier requires either an existing outdoor outlet (if it’s ground level and you’re running a cord, not ideal for safety) or hardwiring to your home’s electrical panel. Most professional installations hardwire the chandelier to a dedicated 15-amp or 20-amp circuit with a wall-mounted switch. If no outdoor circuit exists, you’ll need to run new wire from your breaker panel, a job for a licensed electrician in most jurisdictions.
Check local building codes. Many areas require permits for outdoor electrical work and hardwiring: some don’t. Your local building department or a licensed electrician can confirm. Never skip this: unpermitted electrical work can void homeowner’s insurance and create fire or shock hazards.
Mounting location is crucial. For a pergola or covered patio, you’re fastening to the structural beams. Locate the center joist or structural member, use a stud finder if the framing is hidden, and mark it clearly. Drill a hole through the ceiling box (the chandelier’s mounting canopy), align it over the joist, and use lag bolts or structural anchors rated for outdoor use. Standard drywall anchors alone won’t work: the fixture will sag or crash down when wet and loaded.
For a hung chandelier on an open pergola, the chain and rod must clear the lowest cross-members. Plan the hanging height so the fixture sits at least 6 feet 6 inches from the floor and doesn’t obstruct sight lines. Use a ceiling-rated chain or rod (not standard chain), and secure the top mounting bracket directly to a joist using ½-inch galvanized or stainless-steel lag bolts and washers.
Always turn off power at the breaker before starting any wiring. If hardwiring, connect the fixture’s wires to your circuit using UL-rated exterior wire connectors (not standard wire nuts) and seal them in the ceiling box with silicone caulk to prevent water entry. This step is non-negotiable, water in electrical connections causes shorts and fires. When in doubt, hire a licensed electrician. The $200 to $400 call-out fee is cheap insurance against a $50,000 house fire.
Maintenance and Durability: Keeping Your Chandelier Weather-Resistant
Outdoor chandeliers need twice-yearly attention: spring and fall. Start with a visual inspection. Look for water pooling inside the fixture, rust spots on metal finishes, or corrosion on hanging chains. Wipe the entire fixture with a soft, damp cloth and mild dish soap, avoid abrasive pads or harsh cleaners that strip protective coatings.
For metal finishes, a light coat of automotive wax (the same product you’d use on a car) adds a protective layer. Reapply it every 12 to 18 months to maintain water beading and prevent oxidation. For wrought iron or bronze, rust is sometimes aesthetic, but if you prefer a consistent look, a thin coat of clear lacquer or clear outdoor sealant helps.
Check the bulbs regularly. Outdoor environments shorten bulb life, heat buildup in sealed fixtures, temperature swings, and moisture all take a toll. LED bulbs last much longer than incandescent (25,000+ hours versus 1,000) and generate less heat, so they’re the practical choice. Use outdoor-rated bulbs only: indoor LEDs won’t withstand the temperature extremes and may fail prematurely.
Inspect the wiring and connections annually. If you spot fraying insulation, corrosion on connectors, or any signs of water intrusion, turn off power immediately and consult an electrician. Weathering and UV exposure eventually degrade wires and seals, it’s not a matter of if but when. Budget for a professional inspection every 3 to 5 years if the chandelier is heavily exposed to elements.
For shades or glass, clean gently with a glass cleaner and soft cloth. Avoid pressure washers, the force can crack delicate materials or force water into sealed seams. Most outdoor-rated fixtures carry a 1 to 3-year weathering warranty: keep your receipt and register the product if the manufacturer offers extended coverage.
Lighting Effects and Ambiance: Creating the Perfect Outdoor Atmosphere
A chandelier’s ambiance depends on bulb choice, brightness, and color temperature. Warm white bulbs (2700K color temperature) create a cozy, intimate feel ideal for dining or lounge areas. Cool white (4000K+) is brighter and better for task lighting like reading or food prep. Most homeowners prefer 2700K to 3000K for outdoor entertaining spaces, it flatters skin tones and makes food look appetizing.
Brightness matters too. Measure the room’s square footage and aim for 1 to 1.5 lumens per square foot for ambient lighting (just enough to navigate and set a mood). For task lighting over a dining table, bump it to 2 to 3 lumens per square foot. Most chandelier packaging lists lumens: don’t just buy the highest wattage. A 40-watt LED bulb often outshines a 60-watt incandescent, so check the specs.
Dimmers add flexibility. If your chandelier is hardwired, ask the electrician to install a dimmer-compatible wall switch, not all LED bulbs work with every dimmer, so confirm compatibility when buying bulbs. A good dimmer lets you dial the ambiance from a soft, romantic glow to full brightness for entertaining.
Layering light improves the overall effect. Combine your chandelier with nearby accent lights (sconces, path lights, or string lights) to create depth and prevent harsh shadows. A chandelier alone can feel stark: adding secondary sources makes the outdoor room feel complete and intentional. Many design professionals recommend exploring chandelier options to see how different styles transform outdoor spaces, and planning your lighting scheme is equally important as the fixture itself.
Conclusion
An outdoor chandelier isn’t just décor, it’s a practical investment in your home’s evening usability and curb appeal. Choosing a weather-rated fixture, installing it correctly with proper electrical work, and maintaining it annually ensures years of reliable, beautiful lighting. Take your time sizing the fixture to your space, confirm local permit requirements, and don’t cut corners on electrical connections. Done right, an outdoor chandelier transforms your patio into an elegant gathering place that rivals any interior room.


